How To Send Mail in Laravel 6 API With Gmail
Laravel is the most popular PHP framework in recent times. If your next project is on the laravel framework. Then you must think about implementing Mail service too. if you did not know about how to Send Mail in Laravel then you are in right place. the article is All about How To Send Mail in Laravel with the real-time implementation of laravel mail. This(Laravel) is also a great framework to develop a Rest API. if you are new to laravel then please visit this link Laravel Documentation
Prerequisite
- Basic PHP
- Laravel basic
- Gmail account
Create a Laravel Project
I am using Vs code and Ubuntu on Windows Subsystem for Linux if you don’t know how to set up WSL then please visit this link Enable WSL in Windows 10 run the following command in the VS Code terminal. I am assuming that you already installed the laravel with the composer.
laravel new send_mail_apiUpdate your .env file
After creating a laravel project you must need to update your .env file. replace your mail driver with following detail
MAIL_DRIVER=smtp
MAIL_HOST=smtp.googlemail.com
MAIL_PORT=465
[email protected]
MAIL_PASSWORD=gmail_password
MAIL_ENCRYPTION=ssl
FROM_NAME = ABC Inc
Create Route
This example is sending mail in laravel API using Gmail, therefore, we are using API route not web route. copy and paste the following route in your api.php file. we are not updating anything on our database so we are using get method for sending mail. if you are updating something in your database then you can use the post method.
Route::group(['prefix' => 'v1'], function () {
    Route::get('sendmail', 'MailController@sendmail');
});
Create Controller
Run the following command from your terminal.
php artisan make:controller MailControllerOr please create a file name MailController.php under app/Http/Controllers. Then past the code from the following snippet.
<?php

namespace App\Http\Controllers;

use App\Mail\SendMail;
use Illuminate\Http\Request;
use Illuminate\Support\Facades\Mail;

class MailController extends Controller
{
    //
    public function sendEmail()
    {
        $title = '[Confirmation] Thank you for your order';
        $customer_details = [
            'name' => 'Arogya',
            'address' => 'kathmandu Nepal',
            'phone' => '123123123',
            'email' => '[email protected]'
        ];
        $order_details = [
            'SKU' => 'D-123456',
            'price' => '10000',
            'order_date' => '2020-01-22',
        ];

        $sendmail = Mail::to($customer_details['email'])->send(new SendMail($title, $customer_details, $order_details));
        if (empty($sendmail)) {
            return response()->json(['message' => 'Mail Sent Sucssfully'], 200);
        }else{
            return response()->json(['message' => 'Mail Sent fail'], 400);
        }
    }
}
Create Mail
Run the following command from your terminal.
php artisan make:mail SendMailOr Create a file name SendMail.php under your app/Http/Mail Then paste the following Code.
<?php

namespace App\Mail;

use Illuminate\Bus\Queueable;
use Illuminate\Contracts\Queue\ShouldQueue;
use Illuminate\Mail\Mailable;
use Illuminate\Queue\SerializesModels;

class SendMail extends Mailable
{
    use Queueable, SerializesModels;
    public  $title;
    public $customer_details;
    public $order_details;
    /**
     * Create a new message instance.
     *
     * @return void
     */
    public function __construct($title, $customer_details, $order_details)
    {
        //
        $this->title = $title;
        $this->customer_details= $customer_details;
        $this->order_details = $order_details;
    }

    /**
     * Build the message.
     *
     * @return $this
     */
    public function build()
    {
        return $this->subject($this->title)
        ->view('customer_mail');
    }
}
Create View
You need a blade Blade template to send mail in laravel. create a customer_mail.blade.php under resource/views folder then paste the following code.this time we are sending as text format mail
<br/>
dear {{ $customer_details['name'] }}
<br/>
thank you for ordering with us
<br/>
your order detail is as below
<br/><br/>
---------- Order Detail----------
Order ID : {{ $order_details['SKU'] }}<br/>
price : $ {{ $order_details['price'] }}<br/>
order Date = {{ $order_details['order_date'] }}<br/>
<br/>
Thank you<br/>
our contact detail as of below<br/>
kathmandu nepal<br/>
ph:0123222<br/>
email : [email protected]<br/>
Test
I am using insomnia Rest client to tet the currently created API. you can get it from insomnia Official site then open the application and then. enter your API URL and correct method then click send
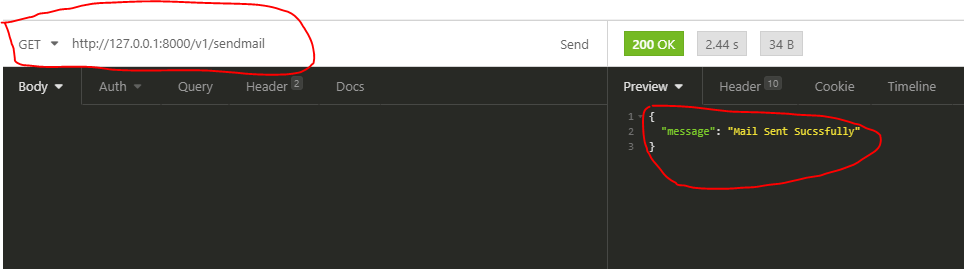
after you see mail send successfully message and status code 200 OK then go to your email inbox and check the mail is received or not.

If you had followed this article then definitely you will get an email if you encounter any problem while sending mail please comment down I will reply you.
