Real-Time Notification With Laravel 6 API (Pusher)
laravel is the most used PHP framework because it provides the best possible functionality for rapid web development. laravel provides a simple but very useful functionality called Event Broadcasting which we are going to use for real-time notification with laravel for more detail please refer to this official document. today we are going to discuss real-time notification with laravel 6 API (pusher).
Create a Laravel project
I am assuming that you already installed laravel with the help of the composer.
run the following command in your terminal to create a new laravel project.
laravel new send_mail_apithen rename your .env example file to .env file.
Install Pusher in Laravel project
To send a real-time notification with laravel (pusher) we need to install pusher on our project lets install with the following artisan command
composer require pusher/pusher-php-serverCreate a Pusher Account
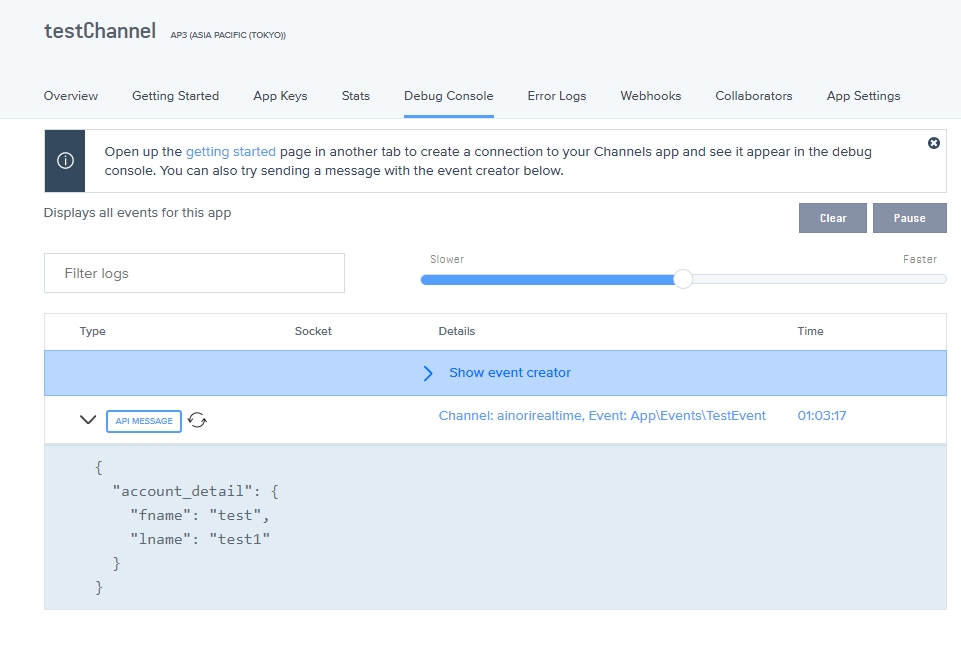
Pusher provides realtime communication between servers, apps, and devices go to the Pusher Official Website and create an account it’s free. then create Channel with your app name. then click on App Keys tab you will get app credential copy this credential and past on your laravel project’s .env file after update your .env file look like as below
PUSHER_APP_ID= your app id
PUSHER_APP_KEY=your app key
PUSHER_APP_SECRET=your app secret
PUSHER_APP_CLUSTER=your app cluster
Create Event
next, let’s create an event with PHP artisan with the following command.
php artisan make:event TestEventThis command will create an event file under app/events open the file and add implements ShouldBroadcast after class TestEvent or you can create a file name TestEvent under app/Events then paste the following code.
<?php

namespace App\Events;

use Illuminate\Broadcasting\Channel;
use Illuminate\Broadcasting\InteractsWithSockets;
use Illuminate\Broadcasting\PresenceChannel;
use Illuminate\Broadcasting\PrivateChannel;
use Illuminate\Contracts\Broadcasting\ShouldBroadcast;
use Illuminate\Foundation\Events\Dispatchable;
use Illuminate\Queue\SerializesModels;

class TestEvent implements ShouldBroadcast
{
    use Dispatchable, InteractsWithSockets, SerializesModels;

    /**
     * Create a new event instance.
     *
     * @return void
     */
    public $account_detail;
    public function __construct($account_detail)
    {
        //
        $this->account_detail = $account_detail;
    }

    /**
     * Get the channels the event should broadcast on.
     *
     * @return \Illuminate\Broadcasting\Channel|array
     */
    public function broadcastOn()
    {
        return new Channel('testChannel');
    }
}
Add Route
This time we are using API so we need to add a Route under api.php file.copy and then paste the code from below.
Route::group(['prefix' => 'v1'], function () {
   Route::post('testevent', 'TestEventController@testEvent');
});
Create Controller
next, let’s create a Controller with PHP artisan with the following command.
php artisan make:controller TestEventControllerOpen your Controller file and then paste the following code.
<?php

namespace App\Http\Controllers;

use App\Events\TestEvent;
use Illuminate\Http\Request;

class TestEventController extends Controller
{
    /**
     * Display a listing of the resource.
     *
     * @return \Illuminate\Http\Response
     */
    public function testEvent(Request $request)

    {

        $firstName = $request->first_name;
        $lastName = $request->last_name;
        $account_detail = ['fname'=>'$firstName','lname'=>'$lastName'];
        $event = '';
        event(new TestEvent($account_detail));
     return response()->json(['status'=>'success','data'=>$account_detail]);
    }


}
Test Event
I am using insomnia Rest client to test currently created API. you can use any rest client you like. you can get insomnia from insomnia Official site then open the application and then enter your API URL and pass your parameter with the correct method then click send.


Now you can send Real-Time Notification With Laravel 6 API (Pusher). if you encounter any problem please let me in the comment section. this is all about real-time notification but if you want to send email to your customer please visit the link to send email using laravel 6 API and Gmail
Next
we will look at how can we use front end js framework to get the event and show to the user with laravel echo and nuxt js (vue js)


