Step To Install Lamp Stack on Windows Subsystem
If you have a windows 64-bit version you can enjoy the Linux environment within windows. before you start to follow Step To Install Lamp Stack on Windows Subsystem. first read about how to enable subsystem for Linux in windows from here. LAMP stands for Linux Apache Mysql PHP or Perl or Python. For this article, we are going to install PHP.
Step One: update Linux
The first thing you need to do is update the Linux system which is also the first letter of the lamp, To update your Linux system. run the following command from your Linux terminal.
sudo apt-get update && sudo apt-get upgrade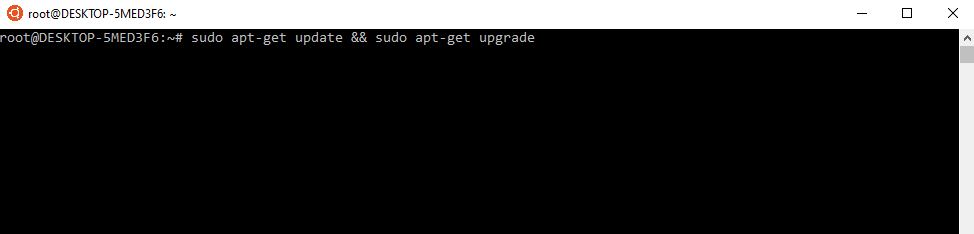
Step Two: Install Apache
The next letter of our Lamp stack is A which means Apache. Let’s install Apache from the command line. to install Apache run following command. to know more about apache click here.
Check Your Linux Version by running following command.
lsb_release -a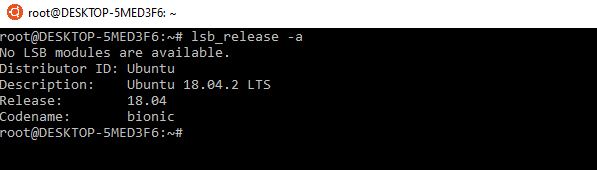
Now you are ready to install Apache. To install apache following code.
sudo apt-get install apache2When you run the code System will ask you to type ‘Y‘ or ‘N‘ to install you need to type ‘Y‘ and press enter. After installation type the following command to start the apache server.
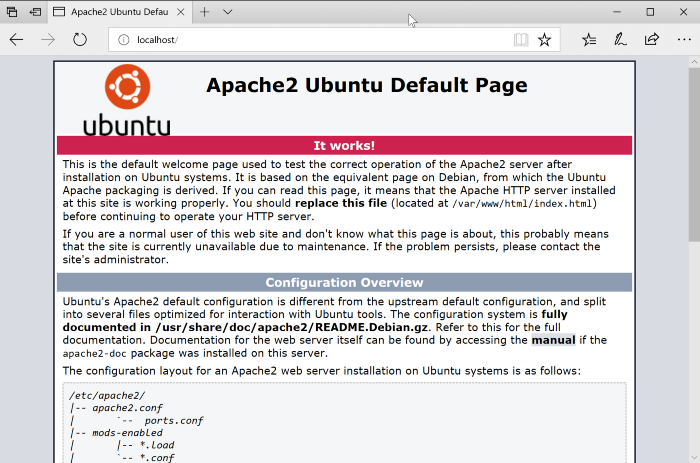
sudo service apache2 startAfter Starting Apache go to your browser and write http://localhost on the address bar. If your browser shows a similar page like below then you have successfully installed the Apache.
Step Three: Install Mysql
The next step is to install Mysql for the database. Which is the Third letter of the lamp. Mysql is the most commonly used database for web applications. To install Mysql run following command.
sudo apt-get install mysql-serverAfter successfully install Mysql then you need to start the msql server. To start the Mysql server run following command.
sudo service mysql start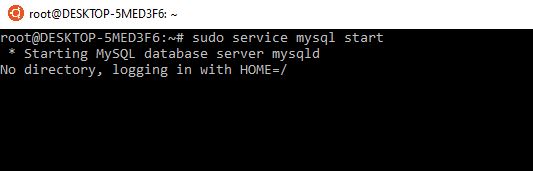
Run Mysql secure installation
To run Mysql Secure installation run following command.
mysql_secure_installationAfter running the command you will get some quest like the below answer as your choice.
Enter current password for root (enter for none): press Enter
Set root password? [Y/n] : press Enter
New password: yourpassword
Re-enter new password: yourpassword
Remove anonymous users? [Y/n] : press Enter
Disallow root login remotely? [Y/n] : press Enter
Remove test database and access to it? [Y/n]: press Enter
Reload privilege tables now? [Y/n] : press Enter
Go to Mysql by the following running following command
mysql -uroot -pyourpasswordThen select database mysql. To change the database paste following command and press enter.
use mysql;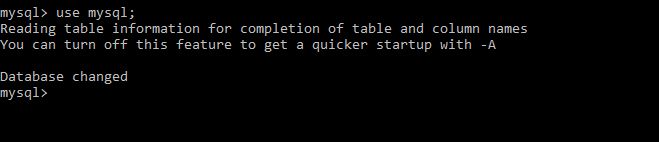
run following command to set a null password for root and flush privileges.
update user set password='' where User='root';flush privileges;That’s it for the database !!
Step four: Install Php
to Install PHP run following command. During installation system will ask you to type ‘Y‘ or ‘N‘. You need to type ‘Y’ and press enter.
sudo apt-get install php libapache2-mod-php php-mysql After the successful installation of PHP run the following command to check PHP version.
php -v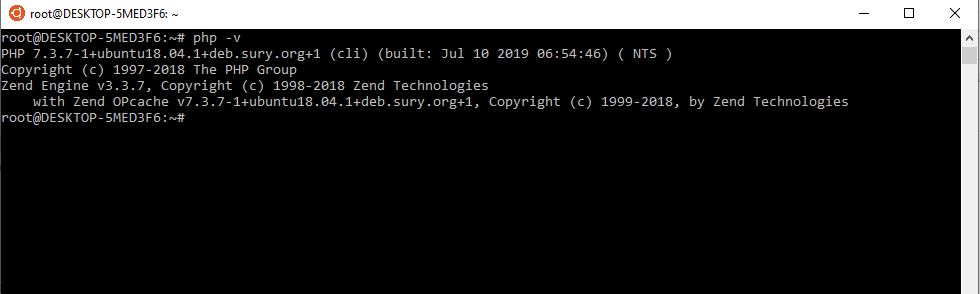
Your PHP version might be changed.
let’s test the PHP file in our server. to check the php file is running or not you need to create a .php extension file. To create the php file go run the following command.
sudo nano /var/www/html/index.phppress ctrl+x to save the file and press enter. then go to browser and type http;//localhost/index.php if there is no problem with your installation process the following page will display.

Now you have a complete environment for web application development. let me know if you encounter any issue during installation by commenting below. Happy Codding !!!
What Next
Step to create virtual hosts on apache and proxy pass.

i have an error access denied for user root@localhost
hello mamadou
sorry for late reply
to solve the problem you need to do
Step 1: Open and Edit /etc/my.cnf or /etc/mysql/my.cnf
Step 2: Add skip-grant-tables which is under [mysqld]
Step 3: Now, Restart Mysql
You must be able to login to mysql now by using the below command mysql -u root -p
then run the following command Run
flush privileges;Now, set new password by ALTER USER ‘root’@’localhost’ IDENTIFIED BY ‘younewpassword’; and go back to /etc/my.cnf and remove/comment skip-grant-tables
Again, Restart Mysql, now you can log in with the new password
mysql -u root -pNow with windows 10 (anniversary edition), you can install the windows subsystem for Linux, which provides an environment for a Linux userspace to operate.