The post Running Multiple PHP version on the same server appeared first on .
]]>I am using centos 7 and Apache2 for this article.
How It Work
when the PHP file is run on apache serve then Apache will call “SetHandler application/x-httpd-php” which will decide which installed module needs to call to run a PHP script. which can be defined under the apache configuration file (httpd.conf) generally can found under “etc/httpd/conf/ “ directory.
This is the standard method to call PHP file when you have only one php installed on the server but when you try to run multiple version of PHP on the same server then we need some magical module called “PHP-FPM”
What is PHP-FPM
FPM is an alternative to normal php FastCGI with some additional features. to know more about PHP-FPM you can check php official website
Follow the Given step to install multiple versions of php. I am installing php 5.6 (oldest php version that which can be installed easily in centos 7 you might install php5.3 but I have not tested yet for php5.3) and another version is the latest php 7.4.
Step 1 Install required packages
Run given Command to install each package.
Apache
yum install httpdExtra Packages for Enterprise Linux(EPEL)
yum install epel-releaseYum utilities
yum install yum-utilsFinally Update yum
yum updateStep 2 Install PHP multiple versions
first of all install remi-repository from where we will install php-fpm.
Remi-repository
yum install http://rpms.remirepo.net/enterprise/remi-release-7.rpmPHP5.6 and PHP-FPM5.6
yum install php56
yum install php56-php-fpm
PHP7.4 and PHP-FPM7.4
yum install php74
yum install php74-php-fpm
Step 3 Stop both PHP-FPM
Stop php-fpm buy pasting following command on terminal.
systemctl stop php56-php-fpm
systemctl stop php74-php-fpm
step 4 Configure PHP-FPM
By default, apache will listen to port 9000 for php.when we have multiple versions of php we need to define a unique port to listen to each php version. you can manually change the port number by opening the www.conf file.
php 5.6
For manually change open /etc/opt/remi/php56/php-fpm.d/www.conf and replace the 9000 with 9056(whatever port you want). If you want to change from the command copy and paste given line in your terminal.
sed -i 's/:9000/:9056/' /etc/opt/remi/php56/php-fpm.d/www.confphp 7.4
For manual open /etc/opt/remi/php74/php-fpm.d/www.conf and replace the 9000 with 9074 (whatever port you want). If you want to change from the command copy and paste given line in your terminal.
sed -i 's/:9000/:9074/' /etc/opt/remi/php74/php-fpm.d/www.confRun two php-fpms
Copy and paste the given command on terminal
systemctl start php74-php-fpm
systemctl start php56-php-fpm
Step 5 Configure SELinux
When you want to use a new port then you need to add it to SELINUX. To add the newly used port on SELINUX run following command.
semanage port -a -t http_port_t -p tcp 9074
semanage port -a -t http_port_t -p tcp 9056
Step 6 Make Script Wrapper
we need to make script wrapper to call both versions of php on the basis of users request to create script wrapper run following command
php5.6
cat > /var/www/cgi-bin/php56.fcgi << EOF
#!/bin/bash
exec /bin/php56-cgi
EOF
php7.4
cat > /var/www/cgi-bin/php74.fcgi << EOF
#!/bin/bash
exec /bin/php74-cgi
EOF
make script wrapper exicutable
Make recently created two file exicutalbe by running following command.
sudo chmod 755 /var/www/cgi-bin/php56.fcgi
sudo chmod 755 /var/www/cgi-bin/php74.fcgi
Step 7 Configure Apache
Open the file httpd.conf and configure your file with desired directory root for php5.6 and php7.4 I am going to display my configuration here.
php5.6
<VirtualHost *:80>
     ServerAdmin [email protected]
     ServerName localhost56.test
     DocumentRoot /var/www/html/56
     DirectoryIndex index.php index.html
<FilesMatch "\.php$">
  <If "-f %{REQUEST_FILENAME}">
      SetHandler "proxy:fcgi://127.0.0.1:9056"
  </If>
</FilesMatch>
     ScriptAlias /cgi-bin/ "/var/www/cgi-bin/"
     AddHandler php56-fcgi .php
     Action php56-fcgi /cgi-bin/php56.fcgi
 <Directory  "/var/www/html/56">
    AllowOverride All
  </Directory>
</VirtualHost>
ph.7.4
<VirtualHost *:80>
    ServerAdmin [email protected]
    ServerName localhost74.test
    DocumentRoot "/var/www/html/php74"
  DirectoryIndex index.html index.php
  <Directory  "/var/www/html/php74">
    AllowOverride All
  </Directory>
  <FilesMatch "\.php$">
 <If "-f %{REQUEST_FILENAME}">
        SetHandler "proxy:fcgi://127.0.0.1:9074"
</If>
</FilesMatch>
 ScriptAlias /cgi-bin/ "/var/www/cgi-bin/"
     AddHandler php74-fcgi .php
     Action php74-fcgi /cgi-bin/php74.fcgi
</VirtualHost>
Step 8 Start/Enable Services
Now All setting is completed we need to start or enable all the settings with the following command
systemctl enable httpd
systemctl enable php56-php-fpm
systemctl enable php74-php-fpm
systemctl start httpd
systemctl start php56-php-fpm
systemctl start php74-php-fpm
now the two domain that we have configred are running in two diffrent versions of php.
Additional Information
when you want to install some package for php then you need to install as below.
for example, if you want to install php-mbstring then you need to install as below
php5.6
yum install php56-php-mbstringphp7.4
yum install php74-php-mbstringafter successfull installtion you need to restart php-fpm
systemctl stop php56-php-fpm
systemctl stop php74-php-fpm
Other than new module installation, if you made any change on php.ini file then you also need to restart PHP-FPM
if you encounter any problem during the instalation then you can contact me by email at [email protected] or you can cmment below I will get you as soon as possible.
Have A good Day !!! 
if you want to know how to install WSL on windows 10 then please visit wsl/ubuntu link
The post Running Multiple PHP version on the same server appeared first on .
]]>The post Custom Helper function in Laravel with real Example appeared first on .
]]>after that, you can call this helper function anywhere in your laravel project. there are lots of predefined helper function you can find these on laravel official documentation. predefined helpers might not fulfill all our your requirement so you might need Costume helper function.
Create a Laravel project
I am assuming that you already installed laravel with the help of the composer. run the following command in your terminal to create a new laravel project.
laravel new custome_helperOr you can install with composer
composer create-project --prefer-dist laravel/laravel custome_helperthen rename your .env example file to .env file.
Create Helper File to create a custom helper function
You can create a helper file under the app folder. I am creating my helper file under app/Helpers then named the file testHelper.php then create a function called test.
<?php
function h_testHelper($firstName, $lastName){
    $fullName = '';
    if(($firstName)&& ($lastName)){
        $fullName = $lastName . $firstName;
    }
    return $fullName;
}
?>
Copy and then paste the above code in your helper file. I am initializing my helper function with h.
Create a Provider
create a provider to make our helper globally available. run the following artisan command to create a new provider.
php artisan make:provider HelperServiceProvideryou can find this provider file under app/Providers. copy and paste the following code in your Provider.
<?php

namespace App\Providers;

use Illuminate\Support\ServiceProvider;

class HelperServiceProvider extends ServiceProvider
{
    /**
     * Register services.
     *
     * @return void
     */
    public function register()
    {
        //
        foreach (glob(sprintf('%s/Helpers/*.php', app_path())) as $helper_file) {
            require_once($helper_file);
        }
    }

    /**
     * Bootstrap services.
     *
     * @return void
     */
    public function boot()
    {
        //
    }
}
Add Provider to Config
add your provider to the config app file. open your config/app.php file and there you can find providers array.at the bottom of the array add the following line
App\Providers\HelperServiceProvider::class,Call From Controller
You can call the helper function in a controller in the following way.
<?php

namespace App\Http\Controllers;


class testcontroller extends Controller
{
    public function testhelpercall(){
        $datas =[
            [
                'id'=>1,
                'firstname'=> 'thierry',
                'familyname'=> 'henry',

            ],
             [
                'id'=>2,
                'firstname'=> 'myfirst',
                'familyname'=> 'mylastname',

            ]
        ];
        foreach($datas as $user)
        {
            $user = (object) $user;
            $datas = [];
            $datas['id'] = $user->id;
            $datas['full_name'] = h_fullName($user);
            $user_data[]=$datas;
        }
        return $user_data;
    }
}
The Output of the above controller is as below

Call from View(Blade)
you can call helper in the blade template in the following way.
<br/>
dear {{ h_fullName($staffdetail) }}
<br/><br/>

I am sending you the guest detail of our monday conference<br/>


<br/>
@foreach ($guests as $guest)
 Name.:{{ h_fullName($guest) }}<br/>

 Address:{{ $guest->address  }}<br>

 Phone Number:{{ $guest->tel  }}<br>

<br/>

@endforeach
<br/>
Here I have presented a very simple example but you can do some serious complex tasks in helpers like getting data from a database storing data to the database and many more.
we also have other article related to laravel you can check those article from here
The post Custom Helper function in Laravel with real Example appeared first on .
]]>The post Real-Time Notification With Laravel 6 API (Pusher) appeared first on .
]]>Create a Laravel project
I am assuming that you already installed laravel with the help of the composer.
run the following command in your terminal to create a new laravel project.
laravel new send_mail_apithen rename your .env example file to .env file.
Install Pusher in Laravel project
To send a real-time notification with laravel (pusher) we need to install pusher on our project lets install with the following artisan command
composer require pusher/pusher-php-serverCreate a Pusher Account
Pusher provides realtime communication between servers, apps, and devices go to the Pusher Official Website and create an account it’s free. then create Channel with your app name. then click on App Keys tab you will get app credential copy this credential and past on your laravel project’s .env file after update your .env file look like as below
PUSHER_APP_ID= your app id
PUSHER_APP_KEY=your app key
PUSHER_APP_SECRET=your app secret
PUSHER_APP_CLUSTER=your app cluster
Create Event
next, let’s create an event with PHP artisan with the following command.
php artisan make:event TestEventThis command will create an event file under app/events open the file and add implements ShouldBroadcast after class TestEvent or you can create a file name TestEvent under app/Events then paste the following code.
<?php

namespace App\Events;

use Illuminate\Broadcasting\Channel;
use Illuminate\Broadcasting\InteractsWithSockets;
use Illuminate\Broadcasting\PresenceChannel;
use Illuminate\Broadcasting\PrivateChannel;
use Illuminate\Contracts\Broadcasting\ShouldBroadcast;
use Illuminate\Foundation\Events\Dispatchable;
use Illuminate\Queue\SerializesModels;

class TestEvent implements ShouldBroadcast
{
    use Dispatchable, InteractsWithSockets, SerializesModels;

    /**
     * Create a new event instance.
     *
     * @return void
     */
    public $account_detail;
    public function __construct($account_detail)
    {
        //
        $this->account_detail = $account_detail;
    }

    /**
     * Get the channels the event should broadcast on.
     *
     * @return \Illuminate\Broadcasting\Channel|array
     */
    public function broadcastOn()
    {
        return new Channel('testChannel');
    }
}
Add Route
This time we are using API so we need to add a Route under api.php file.copy and then paste the code from below.
Route::group(['prefix' => 'v1'], function () {
   Route::post('testevent', 'TestEventController@testEvent');
});
Create Controller
next, let’s create a Controller with PHP artisan with the following command.
php artisan make:controller TestEventControllerOpen your Controller file and then paste the following code.
<?php

namespace App\Http\Controllers;

use App\Events\TestEvent;
use Illuminate\Http\Request;

class TestEventController extends Controller
{
    /**
     * Display a listing of the resource.
     *
     * @return \Illuminate\Http\Response
     */
    public function testEvent(Request $request)

    {

        $firstName = $request->first_name;
        $lastName = $request->last_name;
        $account_detail = ['fname'=>'$firstName','lname'=>'$lastName'];
        $event = '';
        event(new TestEvent($account_detail));
     return response()->json(['status'=>'success','data'=>$account_detail]);
    }


}
Test Event
I am using insomnia Rest client to test currently created API. you can use any rest client you like. you can get insomnia from insomnia Official site then open the application and then enter your API URL and pass your parameter with the correct method then click send.
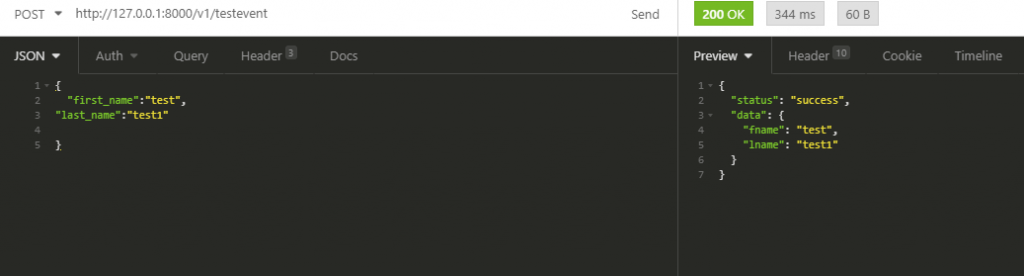
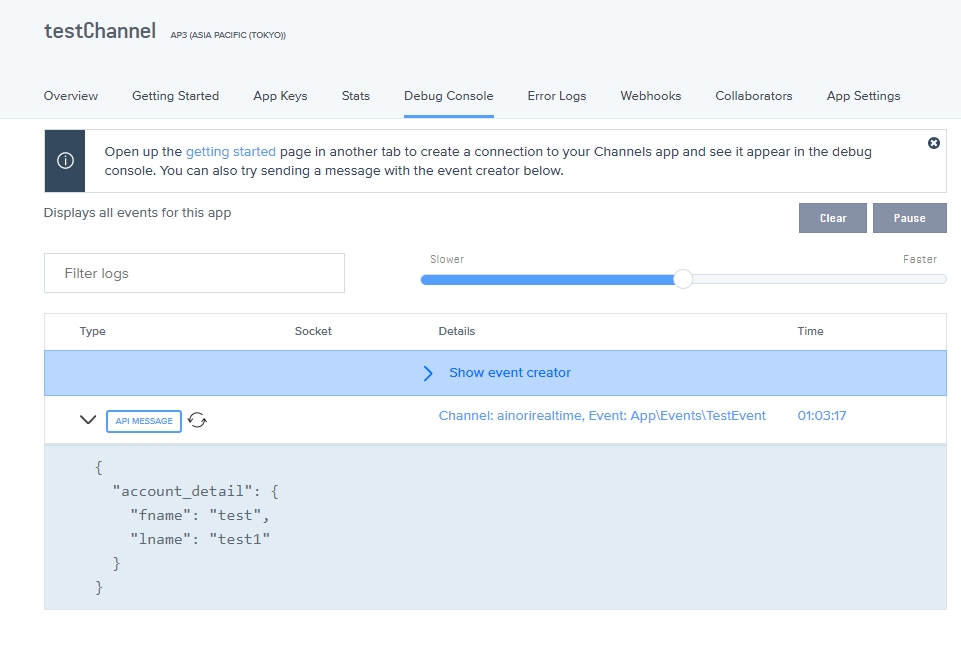
Now you can send Real-Time Notification With Laravel 6 API (Pusher). if you encounter any problem please let me in the comment section. this is all about real-time notification but if you want to send email to your customer please visit the link to send email using laravel 6 API and Gmail
Next
we will look at how can we use front end js framework to get the event and show to the user with laravel echo and nuxt js (vue js)
The post Real-Time Notification With Laravel 6 API (Pusher) appeared first on .
]]>The post How To Send Mail in Laravel 6 API With Gmail appeared first on .
]]>Prerequisite
- Basic PHP
- Laravel basic
- Gmail account
Create a Laravel Project
I am using Vs code and Ubuntu on Windows Subsystem for Linux if you don’t know how to set up WSL then please visit this link Enable WSL in Windows 10 run the following command in the VS Code terminal. I am assuming that you already installed the laravel with the composer.
laravel new send_mail_apiUpdate your .env file
After creating a laravel project you must need to update your .env file. replace your mail driver with following detail
MAIL_DRIVER=smtp
MAIL_HOST=smtp.googlemail.com
MAIL_PORT=465
[email protected]
MAIL_PASSWORD=gmail_password
MAIL_ENCRYPTION=ssl
FROM_NAME = ABC Inc
Create Route
This example is sending mail in laravel API using Gmail, therefore, we are using API route not web route. copy and paste the following route in your api.php file. we are not updating anything on our database so we are using get method for sending mail. if you are updating something in your database then you can use the post method.
Route::group(['prefix' => 'v1'], function () {
    Route::get('sendmail', 'MailController@sendmail');
});
Create Controller
Run the following command from your terminal.
php artisan make:controller MailControllerOr please create a file name MailController.php under app/Http/Controllers. Then past the code from the following snippet.
<?php

namespace App\Http\Controllers;

use App\Mail\SendMail;
use Illuminate\Http\Request;
use Illuminate\Support\Facades\Mail;

class MailController extends Controller
{
    //
    public function sendEmail()
    {
        $title = '[Confirmation] Thank you for your order';
        $customer_details = [
            'name' => 'Arogya',
            'address' => 'kathmandu Nepal',
            'phone' => '123123123',
            'email' => '[email protected]'
        ];
        $order_details = [
            'SKU' => 'D-123456',
            'price' => '10000',
            'order_date' => '2020-01-22',
        ];

        $sendmail = Mail::to($customer_details['email'])->send(new SendMail($title, $customer_details, $order_details));
        if (empty($sendmail)) {
            return response()->json(['message' => 'Mail Sent Sucssfully'], 200);
        }else{
            return response()->json(['message' => 'Mail Sent fail'], 400);
        }
    }
}
Create Mail
Run the following command from your terminal.
php artisan make:mail SendMailOr Create a file name SendMail.php under your app/Http/Mail Then paste the following Code.
<?php

namespace App\Mail;

use Illuminate\Bus\Queueable;
use Illuminate\Contracts\Queue\ShouldQueue;
use Illuminate\Mail\Mailable;
use Illuminate\Queue\SerializesModels;

class SendMail extends Mailable
{
    use Queueable, SerializesModels;
    public  $title;
    public $customer_details;
    public $order_details;
    /**
     * Create a new message instance.
     *
     * @return void
     */
    public function __construct($title, $customer_details, $order_details)
    {
        //
        $this->title = $title;
        $this->customer_details= $customer_details;
        $this->order_details = $order_details;
    }

    /**
     * Build the message.
     *
     * @return $this
     */
    public function build()
    {
        return $this->subject($this->title)
        ->view('customer_mail');
    }
}
Create View
You need a blade Blade template to send mail in laravel. create a customer_mail.blade.php under resource/views folder then paste the following code.this time we are sending as text format mail
<br/>
dear {{ $customer_details['name'] }}
<br/>
thank you for ordering with us
<br/>
your order detail is as below
<br/><br/>
---------- Order Detail----------
Order ID : {{ $order_details['SKU'] }}<br/>
price : $ {{ $order_details['price'] }}<br/>
order Date = {{ $order_details['order_date'] }}<br/>
<br/>
Thank you<br/>
our contact detail as of below<br/>
kathmandu nepal<br/>
ph:0123222<br/>
email : [email protected]<br/>
Test
I am using insomnia Rest client to tet the currently created API. you can get it from insomnia Official site then open the application and then. enter your API URL and correct method then click send
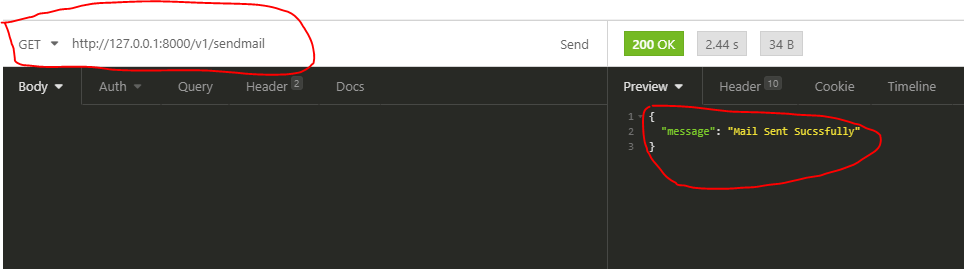
after you see mail send successfully message and status code 200 OK then go to your email inbox and check the mail is received or not.
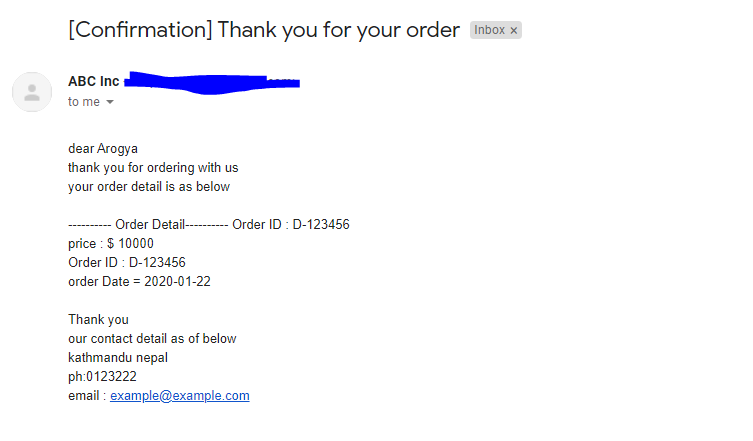
If you had followed this article then definitely you will get an email if you encounter any problem while sending mail please comment down I will reply you.
The post How To Send Mail in Laravel 6 API With Gmail appeared first on .
]]>The post How to handle webhook in Laravel appeared first on .
]]>
Hello, developers how’s life going. Today’s topic is about How to handle webhook in Laravel.
What is laravel
Laravel is an open-source PHP framework. which follows the Model-View-Controller (MVC) architectural pattern. it is developed by Taylor Otwell. The first release of laravel is in June 2011. If you want to know more about laravel you can go to its documentation from here.
What is Webhook
The webhook is changing the behavior of the application or web page using a callback. the callback can be created and managed by any developer. for example, you can change the messaging behavior of the LINE application using webhooks with your custom callback. If you want to know more about webhooks read from here.
The motive of this article is to handling those Webhook with laravel. if you want to learn more about LINE messaging API and custom Line Chatbot with laravel then will create another article just let me know in the comment section.
Step One create a laravel project
In this article, I am assuming that you already have some little knowledge about Laravel.
Run the following command in your terminal.
If you already have a laravel installer then run following command.
laravel new handlewebhook
If you did not have a laravel installer then run following command.
composer create-project --prefer-dist laravel/laravel handlewebhook
Step Two Create a Controller and Method
After you create a laravel project then create a controller webhook by running following command.
php artisan make:controller WebhookController
create a method called webhooks (you can use any name you want). Now write your logic there.
public function webhook(Request $request){
     $data = $request->all()
         // change  YOURMODEL with your model name
         $webhookmodel = YOURMODEL::create([
          'receiveData' =>$data
            ]);
     // you can return response from here
}
Step Three Create a Route.
this is a very important part of this article make a route with the POST method yes post method.
Route::post('/webhook','WebhookController@webhook');
Now use this URL as your webhook URL on any web page or web application then check what the data you have received by calling your model list or by checking the database table. now you have an idea about how to handle webhook in laravel.
if you want to know more about REST API development with laravel then visit the site frequently.
The post How to handle webhook in Laravel appeared first on .
]]>The post Step To Install Lamp Stack on Windows Subsystem appeared first on .
]]>Step One: update Linux
The first thing you need to do is update the Linux system which is also the first letter of the lamp, To update your Linux system. run the following command from your Linux terminal.
sudo apt-get update && sudo apt-get upgrade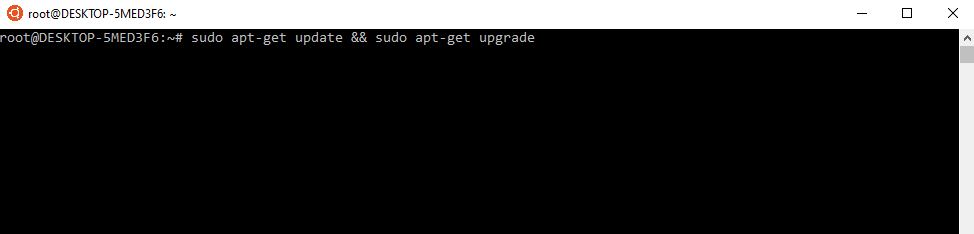
Step Two: Install Apache
The next letter of our Lamp stack is A which means Apache. Let’s install Apache from the command line. to install Apache run following command. to know more about apache click here.
Check Your Linux Version by running following command.
lsb_release -a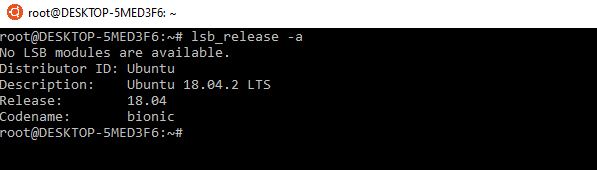
Now you are ready to install Apache. To install apache following code.
sudo apt-get install apache2When you run the code System will ask you to type ‘Y‘ or ‘N‘ to install you need to type ‘Y‘ and press enter. After installation type the following command to start the apache server.
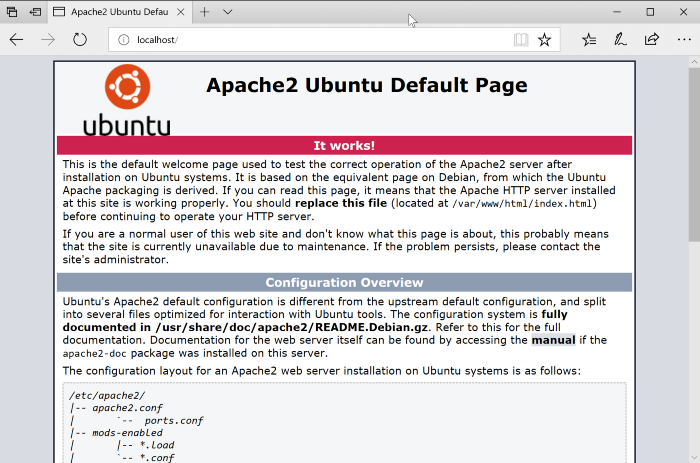
sudo service apache2 startAfter Starting Apache go to your browser and write http://localhost on the address bar. If your browser shows a similar page like below then you have successfully installed the Apache.
Step Three: Install Mysql
The next step is to install Mysql for the database. Which is the Third letter of the lamp. Mysql is the most commonly used database for web applications. To install Mysql run following command.
sudo apt-get install mysql-serverAfter successfully install Mysql then you need to start the msql server. To start the Mysql server run following command.
sudo service mysql start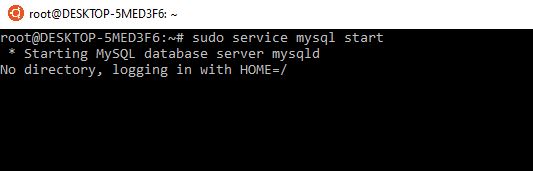
Run Mysql secure installation
To run Mysql Secure installation run following command.
mysql_secure_installationAfter running the command you will get some quest like the below answer as your choice.
Enter current password for root (enter for none): press Enter
Set root password? [Y/n] : press Enter
New password: yourpassword
Re-enter new password: yourpassword
Remove anonymous users? [Y/n] : press Enter
Disallow root login remotely? [Y/n] : press Enter
Remove test database and access to it? [Y/n]: press Enter
Reload privilege tables now? [Y/n] : press Enter
Go to Mysql by the following running following command
mysql -uroot -pyourpasswordThen select database mysql. To change the database paste following command and press enter.
use mysql;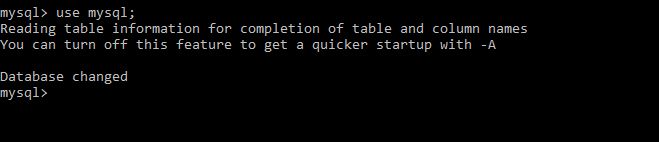
run following command to set a null password for root and flush privileges.
update user set password='' where User='root';flush privileges;That’s it for the database !!
Step four: Install Php
to Install PHP run following command. During installation system will ask you to type ‘Y‘ or ‘N‘. You need to type ‘Y’ and press enter.
sudo apt-get install php libapache2-mod-php php-mysql After the successful installation of PHP run the following command to check PHP version.
php -v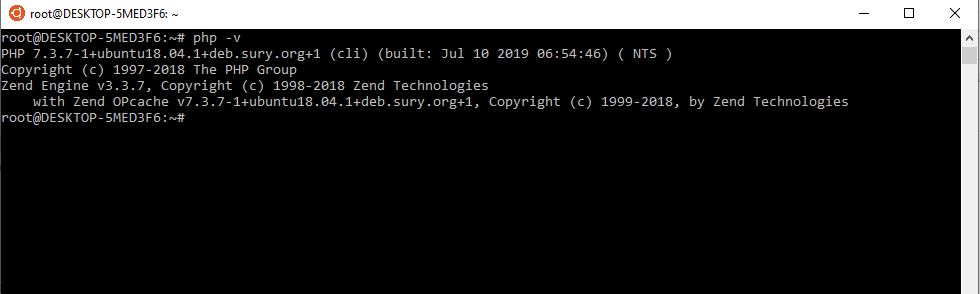
Your PHP version might be changed.
let’s test the PHP file in our server. to check the php file is running or not you need to create a .php extension file. To create the php file go run the following command.
sudo nano /var/www/html/index.phppress ctrl+x to save the file and press enter. then go to browser and type http;//localhost/index.php if there is no problem with your installation process the following page will display.
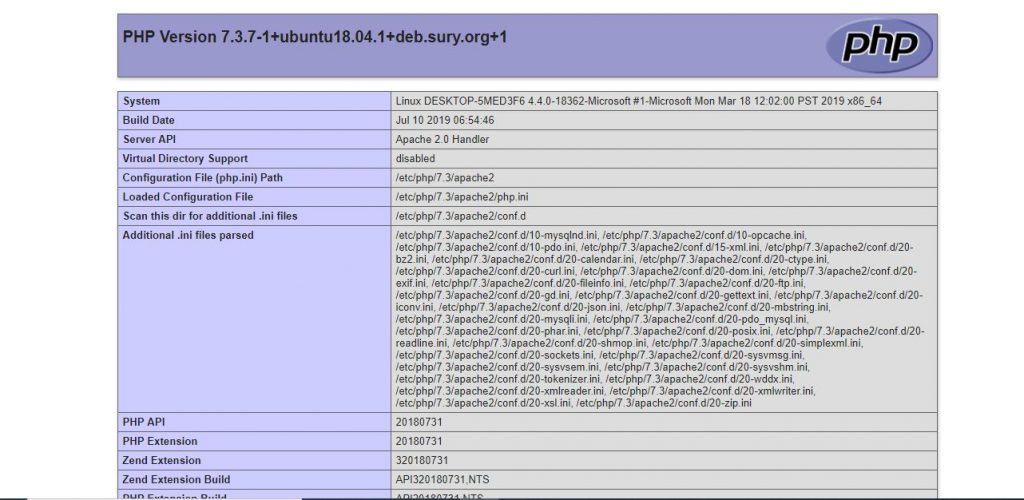
Now you have a complete environment for web application development. let me know if you encounter any issue during installation by commenting below. Happy Codding !!!
What Next
Step to create virtual hosts on apache and proxy pass.
The post Step To Install Lamp Stack on Windows Subsystem appeared first on .
]]>The post Know Vue.js Lifecycle hooks appeared first on .
]]>Vue Js have a very clear and easy to understand lifecycle hook the following image is from Vue js official documentation. You can go and check here
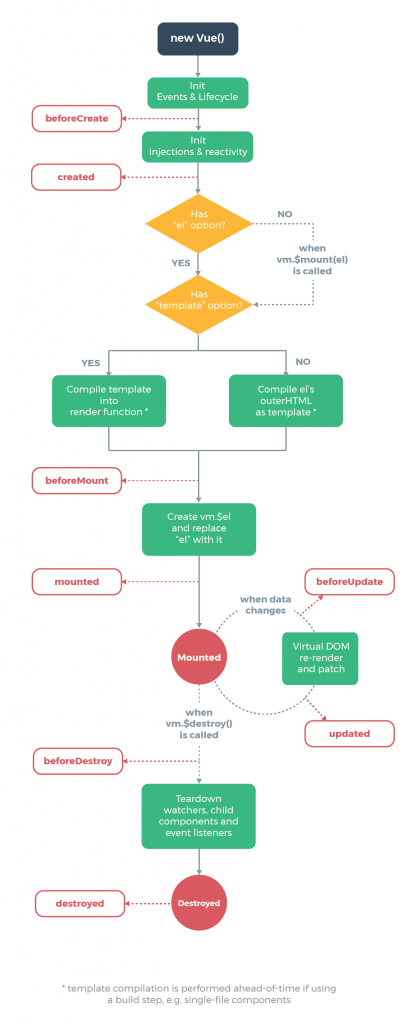
creation (To make rady)
These hooks are very first to run in your component. it allows you to perform the action before you component added to the DOM. it is quite different than other hooks it also runs during serverside rendering.
This is very handy if you need to set up things during client-side rendering and server-side rendering to your component.
Inside the creation hooks, you did not have access to the DOM or mounting element (this.$el).
1. beforeCreate
The beforeCreate Hook runs at the very first during the initializing of DOM. the events are not set up at this moment and data are not reactive.
 example:
 <script>
 export default {
       beforeCreate() {
           console.log(‘i am calling from before create’)
       }
 }
 </script>
2. created
In this hook, you can access reactive data and events but keep in mind that the virtual DOM is not yet mounted or rendered.
<script>
 export default {
   data() {
     return {
       message: ‘hello world’
     }
   },
  computed: {
    messageComputed() {
      console.log('I change when this.message changes.')
      return this.property
    }
  },
  created() {
    this.message = ‘i am changing from created’
     console.log(‘messageComputed will update, because this.message is reactive.’)
  }
}
</script>
Mounting (DOM Initialize)
This is the most used hooks among all. mounting hooks give access to the component before and after the first render. but it doesn’t run during serverside rendering.
It is good practice to use if you need to modify the DOM just before and after the rendering.
It is not a good practice to use when we need to fetch data during initialization. instead of using mounting it is better to use created.
1. beforeMount
It runs just before the initial render and after the template complied. but it cannot be called during serverside rendering.
example:
 <script>
 export default {
     beforeMount() {
     console.log(‘i am just before mounted’)
     }
 }
 </script>
2. Mounted
This hook is called after the instance are mounted when $ek ropery is replaced y the newly created vm.$el property. the component becomes fully functional after this hook is called. this hook is mainly used to fetch data for the initialized component from the server.
Example
<script>
export default {
   mounted() {
   console.log(‘i am mounted hooks and called from mounted’) // I'm text inside the component.
    }
   }
</script>
Updating
This hook is called when there is something change on the initialized component and need to re-render the instance.
it is best to use when the component needs to re-render.
it is bad practice to use when reactive are changed on the component. it is better to use a watch or computed instead of these hooks.
1. beforeUpdate
This hook runs just after something change on rendered component and update begin. just before the DOM re-render. it gives to access to get a new state of any reactive data on the rendered component before actual render. it cannot be called during serverside rendering.
example:
<script>
 export default {
 data () {
    return {
        increment : 0
      }
    },
  beforeUpdate (){
    console.log(this.increment)
     // the increment will log in every secend with added value
 },
  }
 created() {
   setInterval(()=> {
      this.increment++
 }, 1000)
 }
 </script>
2. Updated
This hook run after data changes on rendered DOM and DOM will re-renders. updated hook doesn’t guarantee that all the child has been re-rendered. actually is not best practice to use updated hooks it is better to use computed or watch instead of updated. this hook cannot be called during the serverside rendering
<template>
  <p ref="update">{{increment}}</p>
</template>
<script>
export default {
  data() {
    return {
      increment: 0
    }
  },

  updated() {
    // Fired every second, should always be true
    console.log(+this.$refs['update'].textContent === this.increment)
  },

  created() {
    setInterval(() => {
      this.increment++
    }, 1000)
  }
}
</script>
Destroy (Trashing)
Destroy hooks allow us to trash our loaded component. it is best to use when you want to destroy all the data from local storage where you have saved.
1. beforeDestroy
This is Called just before a Vue instance is destroyed. In this stage the instance is still fully functional we can still perform other stuff within the instance.
<script>
  export default {
    data() {
     return {
       increment: 0
        }
     },
      beforeDestroy() {
       // Clean up the increment.
       // (In this case, effectively nothing)
        this.increment = null
        delete this.increment
       }
  }
</script>
2. destroyed
Called after a rendered instance has been destroyed. when this hook is called all the instance related child instance event listeners and directive will be destroyed.
<script>
import DestroyEverything from ‘./everything’
   export default {
    destroyed() {
     console.log(this) // There's practically nothing here!
     DestroyEverything.informThem(‘everything destroyed')
    }
  }
</script>
Conclusion
This is the life cycle hooks of Vue.js Vue.js is very Progressive adoptable framework. you can find a complete documentation of following link official Vue.js documentation website
Thank you for reading my blog please comment down what do you think about this article and provide your feedback so that I can update the blog regularly
The post Know Vue.js Lifecycle hooks appeared first on .
]]>The post Top 5 JS framework 2019 appeared first on .
]]>what is JS framework? why we need to use JS fraework?
so “A software framework is an abstraction in which software providing generic functionality can be selectively changed by additional user-written code, thus providing application-specific software. A software framework provides a standard way to build and deploy applications. A software framework is a universal, reusable software environment that provides particular functionality as part of a larger software platform to facilitate development of software applications, products and solutions.”
Wikipedia
“If I told you to cut a piece of paper with dimensions 5m by 5m then surely you would do that. But then I ask you to cut 1000 pieces of paper of the same dimensions. Then you won’t do the measuring 1000 times, obviously you would make a frame of 5m by 5m and then with the help of it you would be able to cut 1000 papers in less time. So, what you did is made a framework which would do that type of task. So, instead of performing the same type of task again and again for the same type of applications, what you do is create a framework having all those facilities together in one nice packet, hence providing the abstraction for your application and more importantly many applications.”
stackOverflow
If the above two definitions are trying to elaborate on the word structure, then what is the JS framework? JS frameworks are a collection of JavaScript code libraries
that provide developers with pre-written JS code to use for routine programming features and tasks—literally a framework to build websites or web applications around.
All the five list are as per GITHUB stars
Vue.Js

Despite being developed in the year 2016, this JavaScript framework has already made its place in the market. It has proved its worth by offering multifunctional features. Its double integration mode is one of the most attractive features for building high-end SPA.Single page application on the other hand. This is a very reliable platform for developing a cross-plate recorder. It was initially released in February 2014. This is gaining popularity after 2016. On March 20, 2019, the latest version of Vue.js has been released 2.6.10.
React

Created by Facebook, the React Structure has gained popularity within a short time. In fact, it is used to develop and operate the dynamic User Interface of the web pages with high incoming traffic. It makes the use of a virtual DOM and hence, the integration of the same with any application is easier. it was first released on May 29, 2013.the current stable version is 16.8.6 released on may 6 2019.
Angular

One of the most powerful, efficient and open sources Javascript framework is angular. This framework is powered by Google. It is basically used for the development of the Single Page Application (SPA). It extends HTML in the application and interprets the attributes for data binding. It was first released on September 14, 2016. The current version is angular 7. In the month of May 2019, they issue version 8.0.0.
Ember Js

Ember.js was introduced in the software market in 2015 and since then, it has gained popularity with its extensive application area. The features of Ember.js support two-way data binding and therefore installs a trusted platform to handle complex user interfaces. Popular websites like LinkedIn, Netflix and many more use the Ember.JS platform for their websites. It was initially released on December 8, 2011. On February 19, 2019, the latest version of Ember.js has been released 3.8.0
oficial web site = https://emberjs.com/
Meteor

The application area of Meteor (aka Meteor.js or MeteorJS) retains its own name because it is diverse because it covers almost the major part of software development. The rendering of back-end development, database management, business logic and front-end part of websites is a major area where meteor framework is used. It was initially released on January 20, 2012. The current version of the Meteor JS is 1. released October 201 201
There are lots of other JS framework available in the market. The topmost papular are these. are you developing a system using one of them then be sure you have a better future in web development. personally, I love Vue.js but it is just a personal opinion every framework have its pros and cons so I will discuss the pros and cons of these top 5 JS framework in the next session please stay tuned
The post Top 5 JS framework 2019 appeared first on .
]]>